SuperDirt MIDI

Remember that good old tidal-midi Haskell package? You won’t need it any more! Now you can control your favorite MIDI synth from Tidal with SuperDirt MIDI, and with no other dependencies.

If you’re more of a video-watching person, check out the video tutorial:

Ready to jump in? In this post we’ll cover prerequisites and usage.

Prerequisites

Prerequisites/installation requires later versions of Tidal and SuperDirt:

  1. Upgrade to the latest Tidal (this post assumes version 0.9.10 or greater)
  2. Make sure you have the latest SuperDirt quark. Uninstalling and reinstalling the SuperDirt quark might be easiest. See github.com/supercollider-quarks/quarks for details.

Usage

To begin, you’ll start in SuperCollider. Start up SuperDirt as you normally would. Then, in SuperCollider eval the following code:

MIDIClient.init;

You should now see a list of the system MIDI devices in SuperCollider’s post window. The output will look something like this:

MIDI Sources:
	MIDIEndPoint("LoopBe Internal MIDI", "LoopBe Internal MIDI")
	MIDIEndPoint("Focusrite USB MIDI", "Focusrite USB MIDI")
MIDI Destinations:
	MIDIEndPoint("Microsoft GS Wavetable Synth", "Microsoft GS Wavetable Synth")
	MIDIEndPoint("LoopBe Internal MIDI", "LoopBe Internal MIDI")
	MIDIEndPoint("Focusrite USB MIDI", "Focusrite USB MIDI")

Take note that these MIDI devices have two parts to their names. You will need both parts in the next step, which
is to actually connect to the MIDI device. Eval the following line:

~midiOut = MIDIOut.newByName("Focusrite USB MIDI", "Focusrite USB MIDI"); // substitute your own device here

Above, we have stored a reference to the device in a variable named ~midiOut.

Finally, define the name of the “synth” in Tidal you will use to control this device. Below, we will call it “midi”. Eval the following line:

~dirt.soundLibrary.addMIDI(\midi, ~midiOut);

Optionally, you can define a latency value on your device:

~midiOut.latency = 0.45;

That’s it for initialization. You should now have a MIDI device connected in SuperDirt, running as a synth named “midi”.

Usage in Tidal

Note Patterns

Now we can start writing some Tidal patterns to control the MIDI device. Let’s send it a trivial note pattern:

d1 $ n "0 2 4 7" # s "midi"

That should play a simple four-note pattern. Notice we’re just using the synth name “midi” to send notes to the MIDI device. Piece of cake eh?

You can also use the note-name and octave notation:

d1 $ n "c4 d4 e5 g3" # s "midi"

MIDI Channels

The default MIDI channel is 1. SuperDirt MIDI channels are indexed starting at zero, so MIDI channel 1 is `midichan 0`:

d1 $ note "0 2 4 7" # s "midi" # midichan 0

If your synth is listening on a different channel, let’s say, MIDI channel 5, you would use `midichan 4`:

d1 $ note "0 2 4 7" # s "midi" # midichan 4

Notice that `midichan` accepts a pattern of numbers, so you can use a pattern to play on different MIDI channels:

d1 $ note "0 2 4 7" # s "midi" # midichan "0 4"

The above pattern plays notes “0 2” on channel 1 and “4 7” on channel 5.

CC Params

To send a CC param to your synth, the best way to do it in the new SuperDirt MIDI is with a different Tidal pattern. To create this pattern, you’ll be using
two new SuperDirt MIDI params:

  • ccn – the CC param number you want to control: `ccn 30`
  • ccv – the value to send to the CC param, ranging from 0 to 127: `ccv 64`

Here’s a full example, sending a value of 64 to CC param 30:

d2 $ ccv 64 # ccn 30 # s "midi"

You can of course also specify the MIDI channel with `midichan`:

d2 $ ccv 64 # ccn 30 # s "midi" # midichan 4

You can specify patterns of CC values:

d2 $ ccv "20 40 60 80 100" # ccn 30 # s "midi"
d2 $ ccn "30*4" # ccv (scale 20 100 $ slow 30 sine) # s "midi"

Note that the left-most pattern defines the rhythm, as always with Tidal.

If you have a specific feature on your device that listens on a specific CC number, you can give it a friendly name if you wish:

let ringMod = 30
d2 $ ccv "0 20 50 60" # ccn ringMod # s "midi"

If you have many CC params you want to control at once, a `stack` works well:

d2 $ density 8 $ stack [
  ccn 30 # ccv (scale 0 127 $ slow 30 sine),
  ccn 31 # ccv "[0 70 30 110]/3",
  ccn 32 # ccv 10 
  ] # s "midi"

TidalCycles Extension 0.5.6 for VS Code

The TidalCycles extension for VS Code has a fresh update. A couple of improvements have been made around configuration setting errors and custom boot file path errors.

Config Setting Errors

The new update now removes errors telling you that the TidalCycles config settings were “unknown”. Now it’s just a clean config:

Neat!

Boot File Path Errors

A few minor versions ago, we introduced the ability to configure a path to a custom Tidal boot file. With that, you can now configure Tidal to load up all of your custom stuff in a seamless bootup sequence. However, if VS Code could not locate your custom bootup file it wouldn’t tell you.

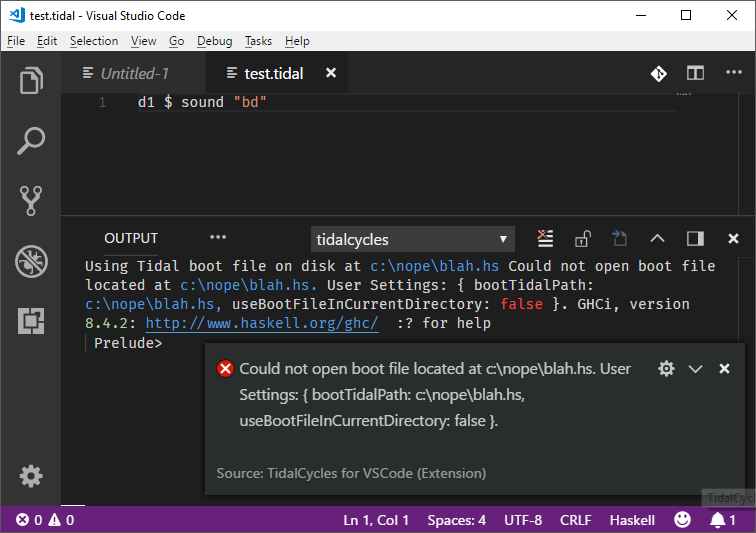
Now, the Tidal console output and a VS Code message will notify you that you boot file was not found:

What’s more is that you can fix your boot file config settings and try to reboot Tidal without restarting VS Code. Fancy!

Oh Hey One More Thing!

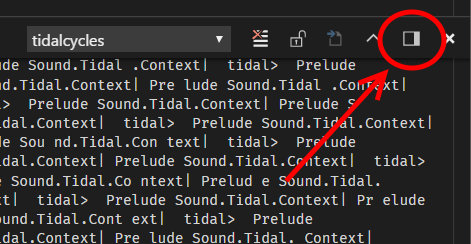
VS Code recently released a new feature where you can dock the terminal to the right-hand side of the IDE:

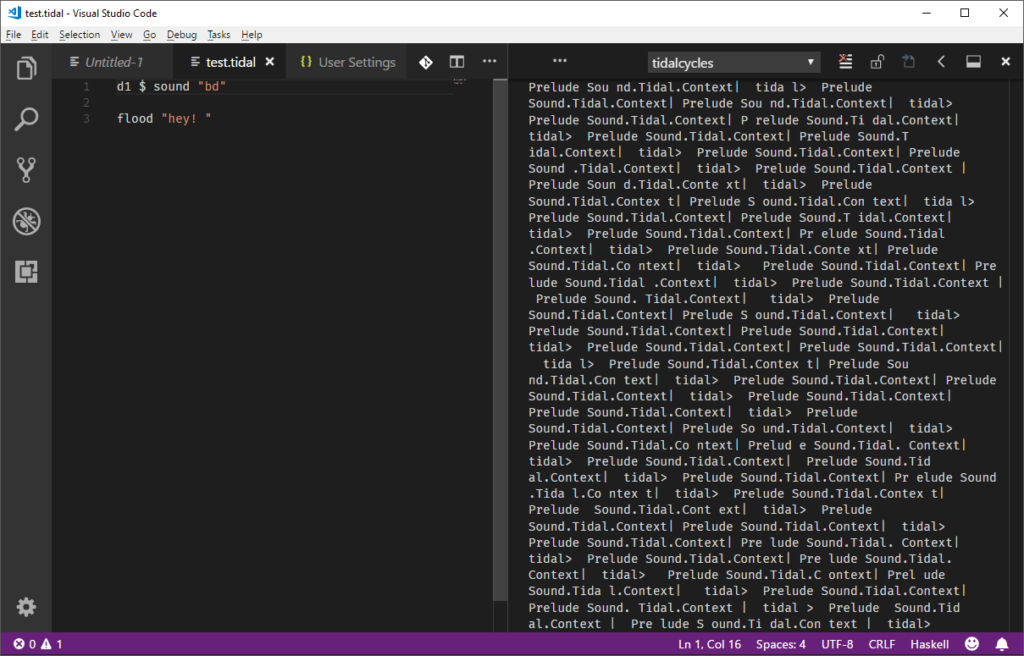
So now you can put the Tidal output to the side instead of below your Tidal code, if you so desire:

Atom package v0.12.1: current directory boot file

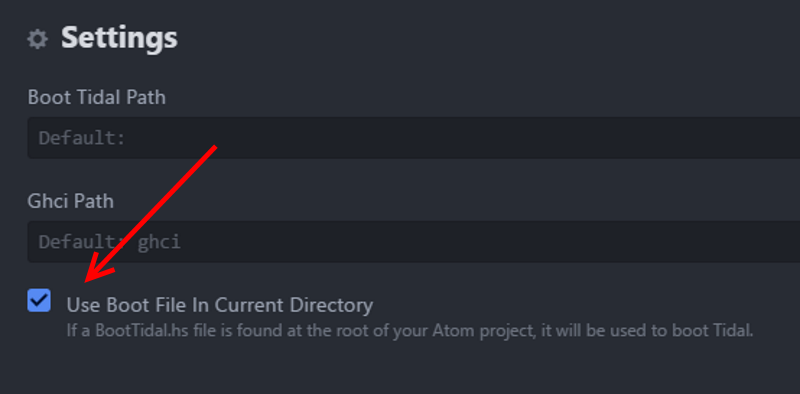
The latest version (0.12.1) of the TidalCycles package for Atom has a new option to use a bootup file in your current project directory:

What this means is that you can now have a custom bootup file for each “project” you may be working on (e.g. compositions, MIDI modules, custom OSC setups, live sets, etc).

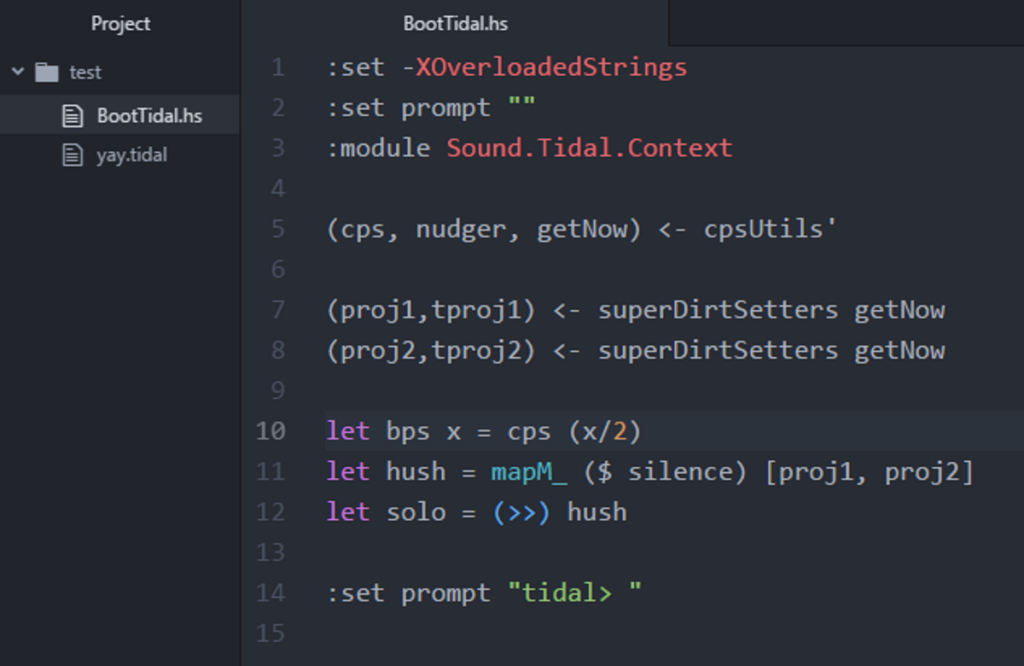
All you need to do for this to work is to create a BootTidal.hs file at the root of your Atom project folder:

If you’re not sure where to start with a custom boot file, you can reference a sample default one on the TidalCycles Atom package page, or use this code:

:set -XOverloadedStrings
:set prompt ""
:module Sound.Tidal.Context

(cps, nudger, getNow) <- cpsUtils'

(d1,t1) <- superDirtSetters getNow
(d2,t2) <- superDirtSetters getNow
(d3,t3) <- superDirtSetters getNow
(d4,t4) <- superDirtSetters getNow
(d5,t5) <- superDirtSetters getNow
(d6,t6) <- superDirtSetters getNow
(d7,t7) <- superDirtSetters getNow
(d8,t8) <- superDirtSetters getNow
(d9,t9) <- superDirtSetters getNow


let bps x = cps (x/2)
let hush = mapM_ ($ silence) [d1,d2,d3,d4,d5,d6,d7,d8,d9]
let solo = (>>) hush

:set prompt "tidal> "

With these configuration options, you can now have complete control over your own custom Tidal boot code rather than modifying the source code of the package’s boot file.

For more information check out this video that explores all of the boot options in the Atom Tidalcycles package:

Elastic Tempo Flux

I just published a new tutorial video on how to achieve continuous, elastic tempo changes in TidalCycles.

The video covers techniques with two different functions: nudge and spaceOut.

nudge

You can use nudge to move the timing of events into the future. Here, we schedule each of the four cp samples with future times of 0, 0.7, 0.2, and 0.4 seconds, respectively:

d1 $ sound "cp*4" # nudge "0 0.7 0.2 0.4"

The above example isn’t very interesting. However, when you apply a sine function to nudge, you can make time appear to stretch in a smooth way:

d1 $ sound "cp*4" # nudge (slow 8 $ sine)

Different pattern densities, scaling, and sine speeds interact with each other to create different results:

d1 $ sound "cp*8" # nudge (range 0 2 $ slow 16 $ sine)

spaceOut

The spaceOut function lets you specify a list of cycle speed multipliers, and then plays the pattern exactly once at each speed:

d1 $ spaceOut [1, 0.5, 1.33, 0.1, 2] $ sound "cp*4 cp*2"

The above code will play the cp*4 cp*2 pattern at 1, then 0.5, 1.33, 0.1, and 2 times the normal cycle speed.

Where spaceOut gets a little more interesting is when you use Haskell’s list syntax to build longer lists of linear (or non-linear) values. Consider this spaceOut pattern that plays at speeds ranging from 1 to 3, incrementing by 0.1:

d1 $ spaceOut [1,1.1..3] $ sound "cp*4"

The above pattern has 30 different speeds (!) but with very little code.

You can achieve speed “oscillations” that resemble a triangle wave by adding two lists together with the ++ operator:

d1 $ spaceOut ([0.1,0.2..3] ++ [3,2.9..0.1]) $ sound "cp*4"

You can use many different Haskell features to build lists. Here is a different method that constructs lists of fractional values using map:

d1 $ spaceOut (map (1/) [1,1.5..10]) $ sound "cp*4"

Atom Package v0.11.0: custom Tidal boot path

A new release (version 0.11.0) of the TidalCycles package for Atom is available today. With this version you can now specify a path to your own boot file in the package settings:

This means that you no longer need to modify the provided BootTidal.hs file in the package with your own custom logic (e.g. custom functions, additional modules, etc).

If you want to create your own boot file:

  1. Create a copy of the original (available here)
  2. Save it anywhere on your computer
  3. Modify the TidalCycles package settings to point to where you saved the new file